Thermometer Sensor Integration via RPi Displays Temperature Changes Directly in a Video Feed
Showing temperature data into a video feed from the AXIS camera. Data are fetched from a USB temperature sensor sent via Raspberry Pi into a camera and shown in the video.
About the Project
This project is a flexible integration for temperature monitoring: outdoors, in a swimming pool, glasshouse etc. It utilizes a TEMPer1f thermometer plugged into Raspberry Pi that's connected to an AXIS camera via network. The temperature is displayed as a dynamic graphic overlay using CamOverlay App.
How Does It Work?
TEMPer1f Sensor integration utilizes a micro app developed for this particular thermometer and additional compatible models. The thermometer is connected to a Raspberry Pi running CamScripter RPi with uploaded TEMPer1f Sensor package. CamScripter RPi forwards the data to an AXIS camera (AXIS M1135, P1375 etc.) featuring CamOverlay App so that the measured temperature can be displayed as a graphic overlay. The overlay becomes a part of the video stream and can therefore be managed in VMS as a standard video source.
The Result
This is an extremely useful and cost-effective thermometer integration that can be applied across many scenarios and supports various graphics styles. Additionally, it's both simple to set up and use.
What You Need
Hardware
Software
The Raspberry Pi features high-quality, two-part ABS construction, with cut-outs for the dual micro HDMI, Audio/Video, USB and Ethernet ports, as well as the USB-C power connector and access to the microSD card.
The PCsensor USB thermometer connects via a USB port and includes an external waterproof sensor, with a measuring range from −40ºC to +125ºC (−104ºF to +257ºF).
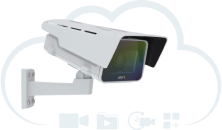
Any compatible AXIS camera (e.g., AXIS P1375) from Axis Communications with an ARTPEC-5/6/7/8 processor can be used for this integration. The full Axis camera portfolio is available at axis.com – just make sure to check compatibility with CamStreamer apps beforehand.
Setup Guide
1. First, install CamScripter RPi onto Raspberry Pi with instructions on the following link: https://www.npmjs.com/package/camscripter-raspberry
2. Open your internet browser and type in the IP address of your Raspberry Pi to open CamScripter App UI. The IP address must be in the following format: http://localhost:52520/settings.html
3. Upload the TEMPer1f Sensor package.
4. Click "Start" to launch the micro application.
5. To set the thermometer up, open CamScripter App UI in your browser, and access the TEMPer1f Sensor via the gear button next to the installed thermometer package.
6. Here you can choose between Fahrenheit and Celsius temperature scales.
Custom Graphics
You can design your own widget or use our custom graphics for the micro app. The file is a part of the temper1fSensor.zip package available at GitHub.
To use our custom design, extract the customGraphicsBackground.png file from the compressed file and import customGraphicsConfig.json (located at the same place) into CamOverlay App's Custom Design settings.