Blog / Insert the stream from an IP camera into your TV distribution as a TV channel
Insert the stream from an IP camera into your TV distribution as a TV channel
12 Sep 2019 - 13:09
The following article will provide you with instructions on how to easily add an H.264 video stream from your AXIS IP camera directly into the program selection of your television. This solution is great for establishments such as hotels, where you can have a stream on the TV in each room. With the CamStreamer App, you can also stream it to the internet, and with the CamOverlay App you can put other interesting information into video such as current weather info / forecast, a promo text, or infoticker. Another usage is for example the broadcast of church services to hospital rooms or in senior-citizen homes and also as a security channel in residential housing.
In our solution, we work with DVB-T, which means Digital Video Broadcasting – Terrestrial; it is the DVB European consortium standard for the broadcast transmission of digital terrestrial television. In the U.S., ATSC standard is used, and in this case you will need a different HDMI modulator (for example a PVI VeCOAX MiniMod-2, which can modulate into ATSC, QAM, DVB-T, DVB-C and ISDB as well).
Necessary HW:
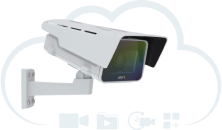
a) Any AXIS camera – an AXIS P1375 is used in the example
b) NetcamViewer Monitor – for transferring 1 to 4 cameras from a local network to an HDMI interface
c) Edison HDMI modulator – for inserting an HDMI source into the multiplex of a DVB-T signal
d) Any TV with a DVB-T tuner or an independent DVB-T tuner
Set-up steps
1. Plug in the NetcamViewer Monitor
Plug in the NetcamViewer Monitor and also connect it via ethernet cable to the local network containing your IP camera.
2. Connect the NetcamViewer Monitor via HDMI
Connect the NetcamViewer Monitor via HDMI interface to your television or monitor – on the screen, you’ll see the IP address on which the device is located.
3. Add your camera
In the NetcamViewer Monitor’s interface, add your camera simply via camera type, or (if you also want audio and to change other parameters) via the “Manual (Advanced) option”.
4. Click on the "Play" icon
After adding a camera, click on the “Play” icon in the camera preview and check the video and audio on your television. If everything is correct, continue on in settings.
Adding a camera via Manual (Advanced) mode
a) Enter the following address into the RTSP Path field: rtsp://root:pass@192.168.100.103/axis-media/media.amp – in the address, replace your camera password (pass) and the camera’s actual IP address.
b) Enter - audio=1&compression=0 in the Extra URL Parameters field – a value of 1 adds audio to video and compression with a value of 0 sets the lowest video compression.
5. Plug in the Edison HDMI modulator
Plug in the Edison HDMI modulator and connect an antenna with a DVB-T signal to its input.
6. Connect an HDMI output of the NetcamViewer Monitor
Connect an HDMI output of the NetcamViewer Monitor to an HDMI input of the Edison modulator.
7. On the modulator, confirm a free channel in the DVB-T multiplex and its name
On the modulator, confirm a free channel in the DVB-T multiplex and its name (distortion/pixelation of the image may occur if there is overlap with an existing channel). If necessary, set additional parameters according to the modulator manual.
8. Connect the output antenna from the modulator
Connect the output antenna from the modulator into the television with a DVB-T tuner, retune all channels, and browse to a program from the modulator (default name is “TV-1”)
Your stream can be enriched with local information via the CamOverlay App. This can include features such as local weather downloaded from the AccuWeather server or an InfoTicker with your own text.
And finally, you can also run the CamStreamer App on your IP camera and stream to platforms such as YouTube, Facebook, DaCast, Wowza, etc.
Download the PDF here.
For more information please contact us.
Blog / Insert the stream from an IP camera into your TV distribution as a TV channel
Contact us
We appreciate your interest in our CamStreamer solutions. Please use our contact form on the right to send an email to either our sales or support department. Answers to frequently asked questions can be found here.
Have a question or suggestion about a specific product? Please contact us at sales@camstreamer.com.
Need assistance with any of our services? Check our FAQs or contact us at support@camstreamer.com.
You can also reach out to our nearest local partners, who are always ready to assist.